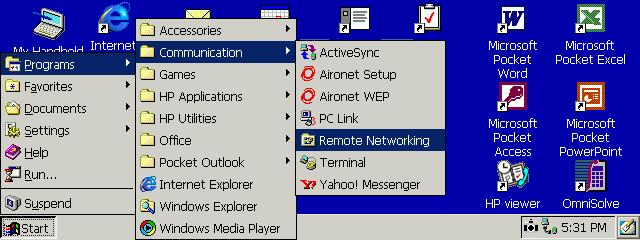
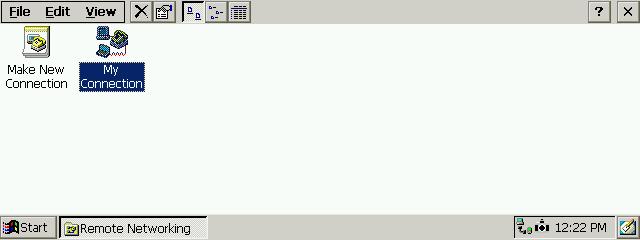
Click Start, Programs, Communications, Remote Networking, as seen below:
Click Make New Connection, on the screen raised in the previous step as seen below:

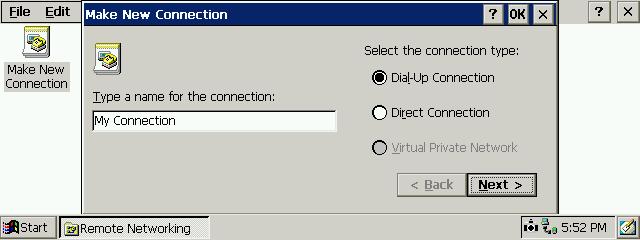
Type a name you'll recognize later for the connection where it says My Connection, and select Dial-Up Connection, like the screen below, then click next:
The screen below allows you to select which modem you wish to use to connect to the internet..
For mobile phones with built in IrDA modems:
- Select Generic IrDA modem, remembering to enable irda on your mobile phone in it's setup screen.
For "compact flash" type modem cards:
- This may require a disk to be installed from your modem manufacturer - contact their technical support division for more information.
If you wish to use the built in modem:
- Select Built-In V.90 Modem

Now click Configure, and you'll see the screen below:
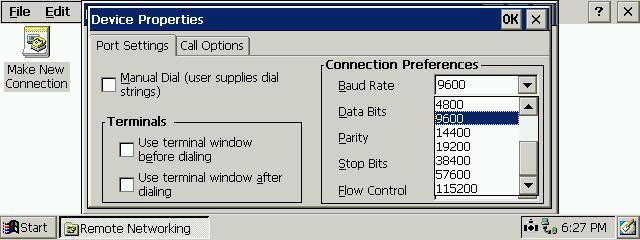
Particularly useful fault finding listed below if you can't connect:
Only tick the box use terminal window after dialling if you find you are disconnected straight after connecting - this would most likely be caused by an incorrect username or password...
Ticking this box will allow you to enter your username & password manually - directly into the server - and show you any errors it may be returning... assuming you enter your login name and password correctly, you should be offered an option to initiate the internet connection (or start ppp or something to that effect), or may even see rubbish like *^(*%(@*&#$Y@I#@ appearing on the screen - this is the internet connection initiating.... it is time critical and important to close the terminal window the moment you see this gibberish appearing, so your handheld can do it's part - otherwise the connection will close.
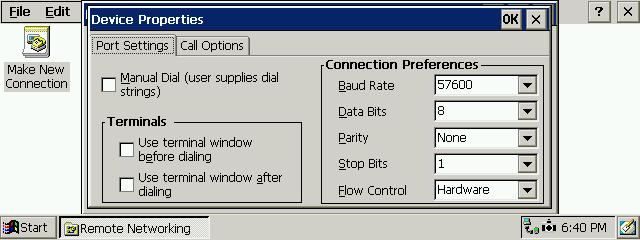
If this is your first run through, the basic configuration for above is as follows:
- No ticks in any of the boxes on the left.
- Baud Rate is 9600 for GSM phones, 57600 for the built-in and compact flash/PCMCIA 56k modems unless otherwise stated in the modem's manual.
- Data Bits, Parity, Stop Bits and Flow Control remain the defaults (see the screen below for standard setup).
Now click Call Options, and you'll see the screen below:
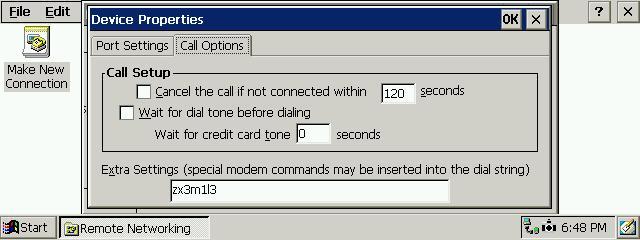
Untick the boxes, as pictured above. The entry in extra settings will reset your modem and set it's speaker volume to maximum before each call so you can hear what is going on (assuming your modem has a speaker).. if you prefer things silent, this option is not required.
Click the OK button up the top, then TCP/IP Settings on the following screen, and you'll see the screen below:

The above settings are the default, and are correct for most internet services. If your ISP has allocated you a fixed IP address, untick Use Server-assigned IP Address and enter it in the box provided.
Click Name Servers, and you'll see the screen below:
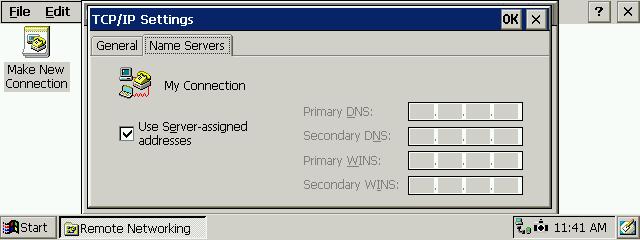
The above settings are the default, and are correct for most internet services. If your ISP has allocated fixed DNS servers, untick Use Server-assigned addresses and enter one or both addresses in the boxes provided. The example below illustrates how fixed DNS servers are configured - in this case for access via the ISP IHUG. (As below, always leave all the WINS addresses as 0s).
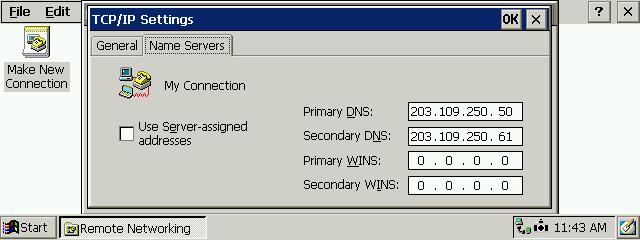
If your device will connect but not successfully load pages in Internet Explorer, it is important to enter at least a primary & preferably a secondary DNS - your internet provider will provide you with these if you call their technical support division. You may want to also confirm when calling them if a proxy server must be used on their service, and if so, take down it's address & port number (we'll cover this later - make sure you write down the address if they do).
Click ok up the top once this window is complete, and you'll return to the screen below:
Click Next, and you'll see the screen below:
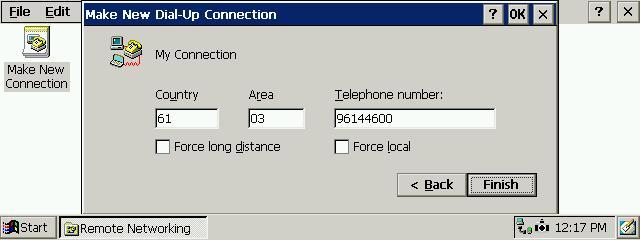
Leave the country code as 61 and the area code as your local one eg. 03, and leave them as this when overseas. This will eliminate confusion when abroad - you will see why as we move on... just remember to insert any special codes in the Telephone number box with the internet providers (ISP's) dialup number, using commas if you wish to insert a short pause into the dialling.
Click Finish, and you'll see the screen below:
Double-click the new connection we have made or highlight it and press enter, and you will see the screen below:
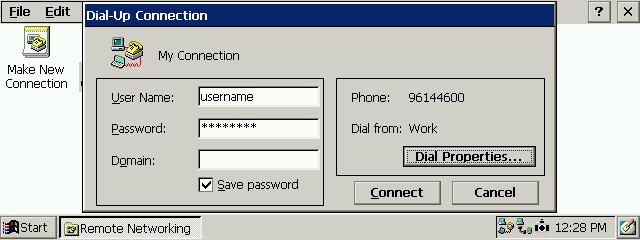
Your username and password need to be entered exactly as provided by your internet provider (ISP) - right down to the correct capitalization - if in doubt, it is worth a call to their support division to confirm these details.
Click Dial Properties, and you'll see the screen below:
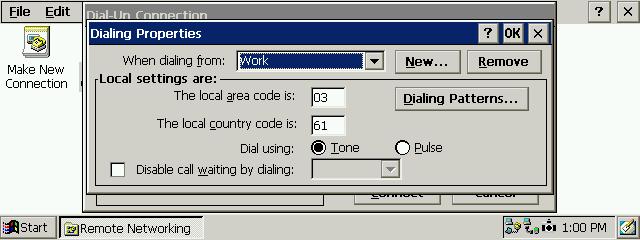
Particularly useful if you see numbers listed before the dialin number when connecting:
Once again, it is important we only use one location, with 61 in the country code, and your STD code (eg 03) in the area code sections above. This will prevent strange numbers from being inserted before the dialin number, which would be caused by a mismatch between the area/country code here, and the one in the connectoid settings.
If you always leave them the same, and only insert any special STD codes in the dialin number box, things will be a lot more simple & predictable - particularly if travelling.
Click Dialing Patterns, and you'll see the screen below:
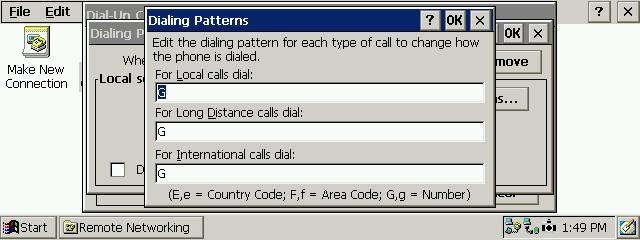
As you can see above, the final step of preventing strange numbers appearing before the dialin number is setting all the fields to just a g. Inevitably, country & area codes don't appear as expected unless they are set exactly right everywhere on the palmtop. Keeping them all the same allows you to update these codes purely by editing the phone number field, the only place where these codes need to be inserted.
Click OK to return to the previous screen, then OK again to return to the screen below:
You should now have a connectoid like "My Connection", as shown above.
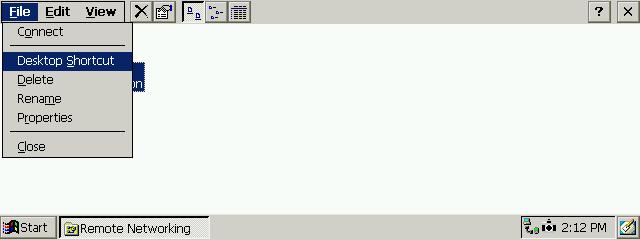
If you want to create a shortcut to your connection on the desktop, click cancel to return to the Remote Networking screen, and highlight your connection, as pictured below.
Now click File, Desktop Shortcut as seen below - even though you will get no confirmation of success, you will now have a shortcut to your new connection on the desktop. Close the Remote Networking window to complete the setup of your connection.
To Configure Internet Explorer:
Load Internet Explorer using the plastic shortcut button at the top of the keyboard (with the Microsoft "e" icon on it) or click Start, Programs, then Internet Explorer and you'll see the screen below:
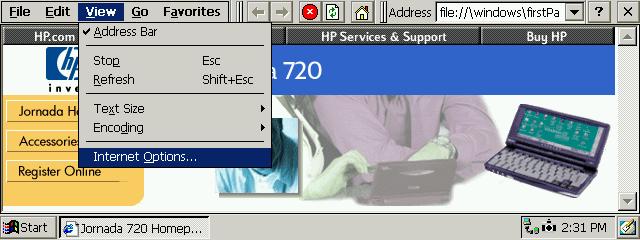
Clicking View then Internet Options (as above) will bring up the configuration screen, as seen below:
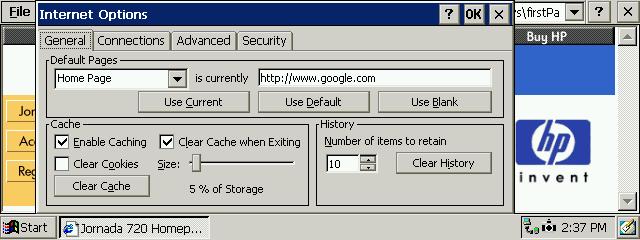
As above, Home Page can be configured to a web page of your choice - I recommend a good search engine, as pictured above.
Clicking Connections will bring up the configuration screen where we can enter the proxy server, as seen below:
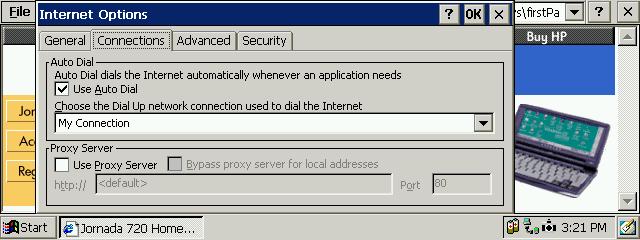
As with above, tick Use Auto Dial, and select the connectoid in the box that you recognise as the one configured earlier for your internet provider.
Ensure your settings include your proxy server address (if required) in the box above that says Use Proxy Server and that the port number is correct for your internet provider (their technical support division will confirm this). If your provider does not require a proxy, or you don't have one, it may very well work without it... just remove the tick from the box Use Proxy Server.
Finally, click ok up the top to complete the settings for Internet Explorer, and close it by clicking the x in the top corner to move on...
To configure Pocket Outlook Inbox:
Press the plastic button at the top of the keyboard with an envelope on it (the inbox button), and you'll see the screen below:
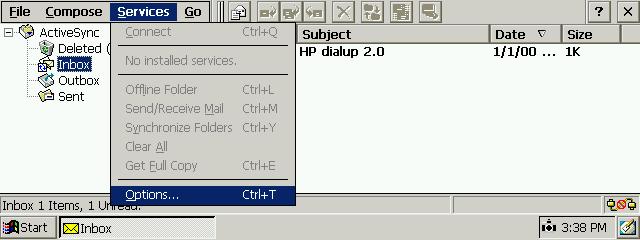
As above, click Services then Options to bring up the configuration screen, as seen below:
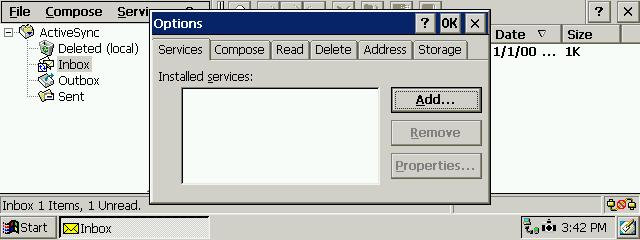
Clicking Add will bring up the configuration screen, as seen below:
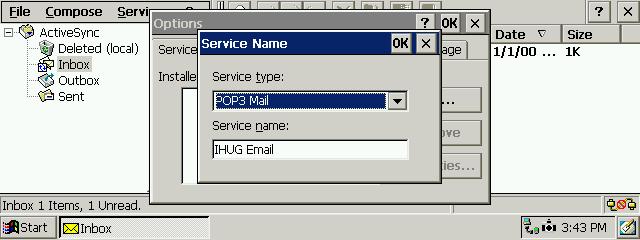
Ensure you select POP3 Mail, as seen above, not IMAP4.
The service name is a cosmetic name - type in one you'll recognise as above.
Clicking OK will bring up the settings screen, as seen below:
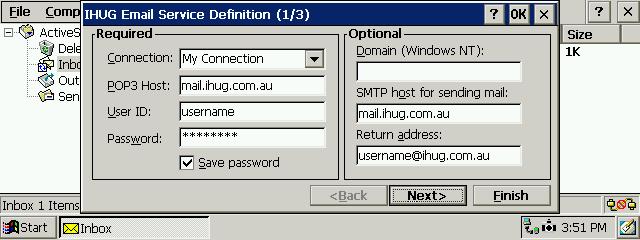
If you don't have any of the server addresses/details required for the following few steps, your internet providers' technical support division will supply you with them.
First, ensure your new internet providers' connectoid is selected in the first box.
In the POP3 Host box, enter the address of your incoming mail (POP3) server.
As with the connection, your User ID and password must be typed exactly in the User ID & Password fields
The Domain box must remain blank.
The SMTP host box must contain the address of the outgoing (SMTP) mail server.
The Return Address must contain your email address, so people can get back to you when hitting reply to your emails.
Clicking Next will bring up the next settings screen, as seen below:
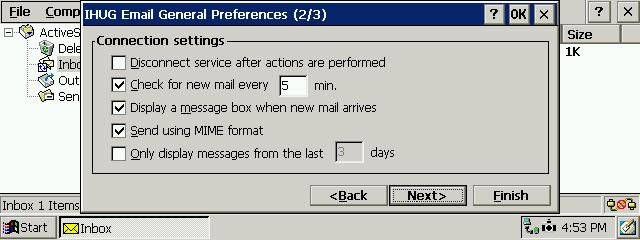
Although the above settings are really personal preference, I would recommend mirroring them for minimal annoyance during operation.
Clicking Next will bring up the final settings screen, as seen below:
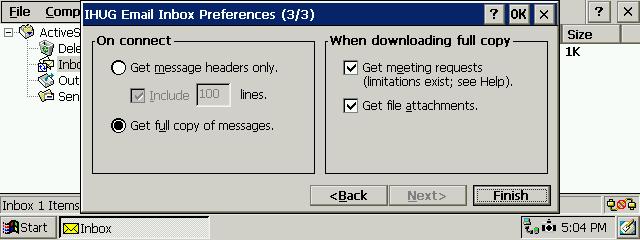
As with above, once again personal preference.
On mobiles, getting file attachments is not such a great idea... you might want to untick Get file attachments in that case.
Clicking Finish, then OK up the top will cause the screen below to pop up:
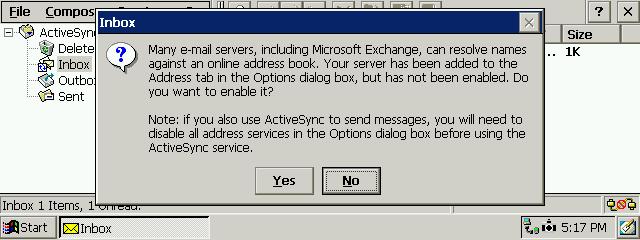
Select No to complete the setup!
You will notice a number of further configuration tabs across the top of the window when you return to the options screen - these will allow you to fine tune your personal preferences, but are not required to connect, and are beyond the scope of this HOWTO.
Connecting to the internet:
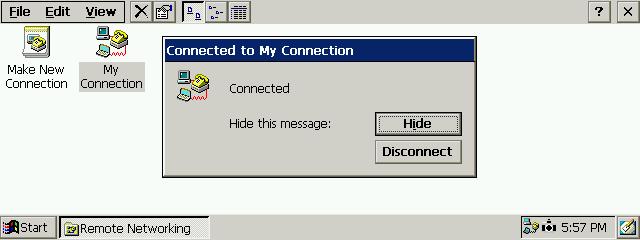
To connect, you can get to the connectoid we did earlier by clicking Start, Programs, Communications, Remote Networking. Then just click on it (or it's icon) - if you created a shortcut on the desktop earlier, it will also take you to the same screen below:
It is important, naturally, when keying in your username & password, that it is exactly correct, right down to capitalisation. Domain must also remain blank. Before hitting connect, confirm no strange numbers are listed in the phone number - if you see weird numbers, confirm your area & country code settings all match using the guide above for setting up a connectoid.
Assuming you hit connect, and everything works as expected, you should next see the messages below:

If not, consider using the post dial terminal window to confirm the internet provider isn't returning an error when receiving your username & password. This can be easily located towards the top of this HOWTO in the section titled Particularly useful fault finding listed below if you can't connect. Should you require further assistance, please call HP's Jornada technical support division.